Mint and Sumac

  • Blog
  • About
  • Recipes
  • Contact
shortbread_cookies_horizontal.jpg

My Grandma's Shortbread Cookies

December 12, 2020 by Gizem in Dessert

I have never really been a cookie person except for these shortbread cookies. I find most cookies too sweet. This is my grandmother’s recipe and whenever she made these cookies, I would eat a whole batch in a couple of days. These cookies are still one of the two desserts I always request from her. Last year, I finally asked her for the recipe..

The keys to these cookies are clarified butter and lots of flour. I have no idea how these two main ingredients plus sugar can create such magic. The center of the cookie has a little bit of a snap but the moment it comes in contact with your tongue, it starts melting.

With the holidays approaching, everyone is baking cookies as gifts. I selfishly baked the whole batch for myself and ate it too. No regrets. These cookies do however, make great gifts mainly because they keep really well. And if you want to jazz them up, you can even dip one corner in melted chocolate before serving.

Yields: 24 cookies Time: 1 hour 15 minutes

Ingredients

2 1/2 sticks unsalted butter

3/4 cup powdered sugar

1 1/2 tbsp vegetable oil

3 1/2 - 4 cups all purpose flour


Preparation

1. To make clarified butter, place the butter in a saucepan and melt over very low heat. We don’t want the butter to boil and burn so low heat is key. The goal is to separate the butter from all the milk solids. 

2. Once all the butter is melted, you will see white milk solids coming to the top. Let the butter cool for 10-15 minutes, this will help settle the milk solids to the bottom of the pot. 

3. Without pouring the milk solids, slowly pour the cooled down, melted butter into a mixing bowl. With a spoon, skim any leftover clarified butter from the top of the pot and transfer to the mixing bowl. You should now have clarified butter in your mixing bowl and all the white milk solids in the pot. You can discard the milk solids or keep them to add into eggs, pancakes, biscuits, etc. 

4. Let the clarified butter solidify in the fridge for 10-15 minutes. We want the clarified butter to be pretty soft for kneading. If you forget the butter in the fridge for too long, take it out and bring it back to room temperature. 

5. Once the butter is solid yet soft, take it out of the fridge. Add powdered sugar and vegetable oil into the mixing bowl. Mix using your hands or a mixer until the sugar is fully incorporated and the mixture has a paste-like texture. 

6. Add in the flour, 1 cup at a time. Incorporate the flour completely before adding the next cup. Depending on how much clarified butter you have, you might need a little more or less flour. We are aiming for a dough that is soft and that does not stick to your fingers. It should hold shape without crumbling. If the dough gets too crumbly, add a tablespoon vegetable oil to soften. 

7. I find this dough easier to shape after chilling in the fridge for 15 minutes. If you are in a rush, you can skip this step and continue with shaping. 

8. Line a baking sheet with parchment. Preheat the oven to 340 F. 

9. Working in batches, roll the dough into a 1 inch thick log. Using a sharp knife, cut 3 inches long cookies with angled edges as shown in the picture below. 

10. To give cookies their S shape, hold from the top left and the bottom right corners and push the dough inwards as shown in the pictures below. (I prefer the S shape but these cookies can be shaped in any way you like.) 

11. Place cookies 1 inch apart on the prepared baking sheet. Bake until the cookies turn white on the top, for 15 minutes. 

12. Let cool completely before transferring to a plate. The dough needs to set for at least an hour before you can handle the cookies. Store in a tightly covered container at room temperature. These cookies are even more delicious the next day. 

View fullsize shortbread_cookies_step1
View fullsize shortbread_cookies_step2
View fullsize shortbread_cookies_step3
View fullsize shortbread_cookies_step5
View fullsize shortbread_cookies_step6
View fullsize shortbread_cookies_step9
View fullsize shortbread_cookies_step10
December 12, 2020 /Gizem
butter, powdered sugar, cookie, shortbread
Dessert
1 Comment
spinach-yogurt-tomato-sauce

Sautéed Spinach with Garlicky Yogurt

December 05, 2020 by Gizem in Meze, Salads

2020 has been a year where I had a love hate relationship with food. Some days I’d have an insatiable motivation to cook the most elaborate dishes and try complicated, five pages long, bread recipes and on some days, I didn’t even want to open the fridge. Lately I found the balance by finding comfort in simplicity. Cooking simpler food that I love, I know how to cook and that doesn’t require 15 obscure ingredients that I would normally enjoy searching in crowded shelves of specialty stores, seems to do the trick. 

So here is a fancy looking yet simple salad (or side dish, meze) recipe that needs only 5 ingredients plus salt. You can serve it as a salad or a side dish, it goes really well with rice and meats, or you can spread large dollops on a slice of bread and call it lunch on a day you don’t feel like cooking. 

As 2020 is coming to a close, I am starting to enjoy cooking again. It is a slow process but sticking to simpler and familiar food has been helpful. How is your relationship with cooking this year? Comment below, I’d love to hear your thoughts. 

Yields: 6 servings Time: 20 minutes

Ingredients

2 cups plain yogurt (or Greek yogurt diluted with 2-3 tbsp water)

1 garlic clove, grated

Pinch of salt

2 bunches fresh spinach (not baby spinach)

1 tbsp tomato paste

2 tbsp olive oil


Preparation

1. Throughly wash the spinach. Most spinach leaves have some residue soil on the stems, so the best way to wash them is to submerge in water for 5 minutes and let the soil, if there is any, fall to the bottom. You can also wash them in a colander in small batches, rubbing with your hands until all the residue is washed away. 

2. Place the yogurt in a serving platter like a wide pasta bowl. If you are using Greek yogurt, add 2-3 tablespoons of water to make the yogurt runnier. Mix until the yogurt is smooth 

3. Add the salt and grated garlic into the yogurt and stir until evenly distributed. Spread the garlicky yougurt evenly inside the platter.

4. Over medium heat, cook down the spinach until they are wilted but still in bright green colors, 2-3 minutes. Transfer to the serving platter and distribute evenly over the yogurt.

5. Add the olive oil and tomato paste into a small pot (I use a Turkish coffee pot). Over medium-high heat, while stirring, warm up the olive oil and the tomato paste. When the oil turns into red and starts to bubble a bit, take off of the heat. With the help of a spoon distribute dollops of the tomato sauce over the spinach and drizzle any leftover oil all over the dish.

6. Serve warm. This dish is still delicious chilled as well. 

Enjoy!

View fullsize spinach_salad_step1
View fullsize spinach_salad_step2
View fullsize spinach_salad_step3
December 05, 2020 /Gizem
spinach, vegetarian, yogurt
Meze, Salads
Comment
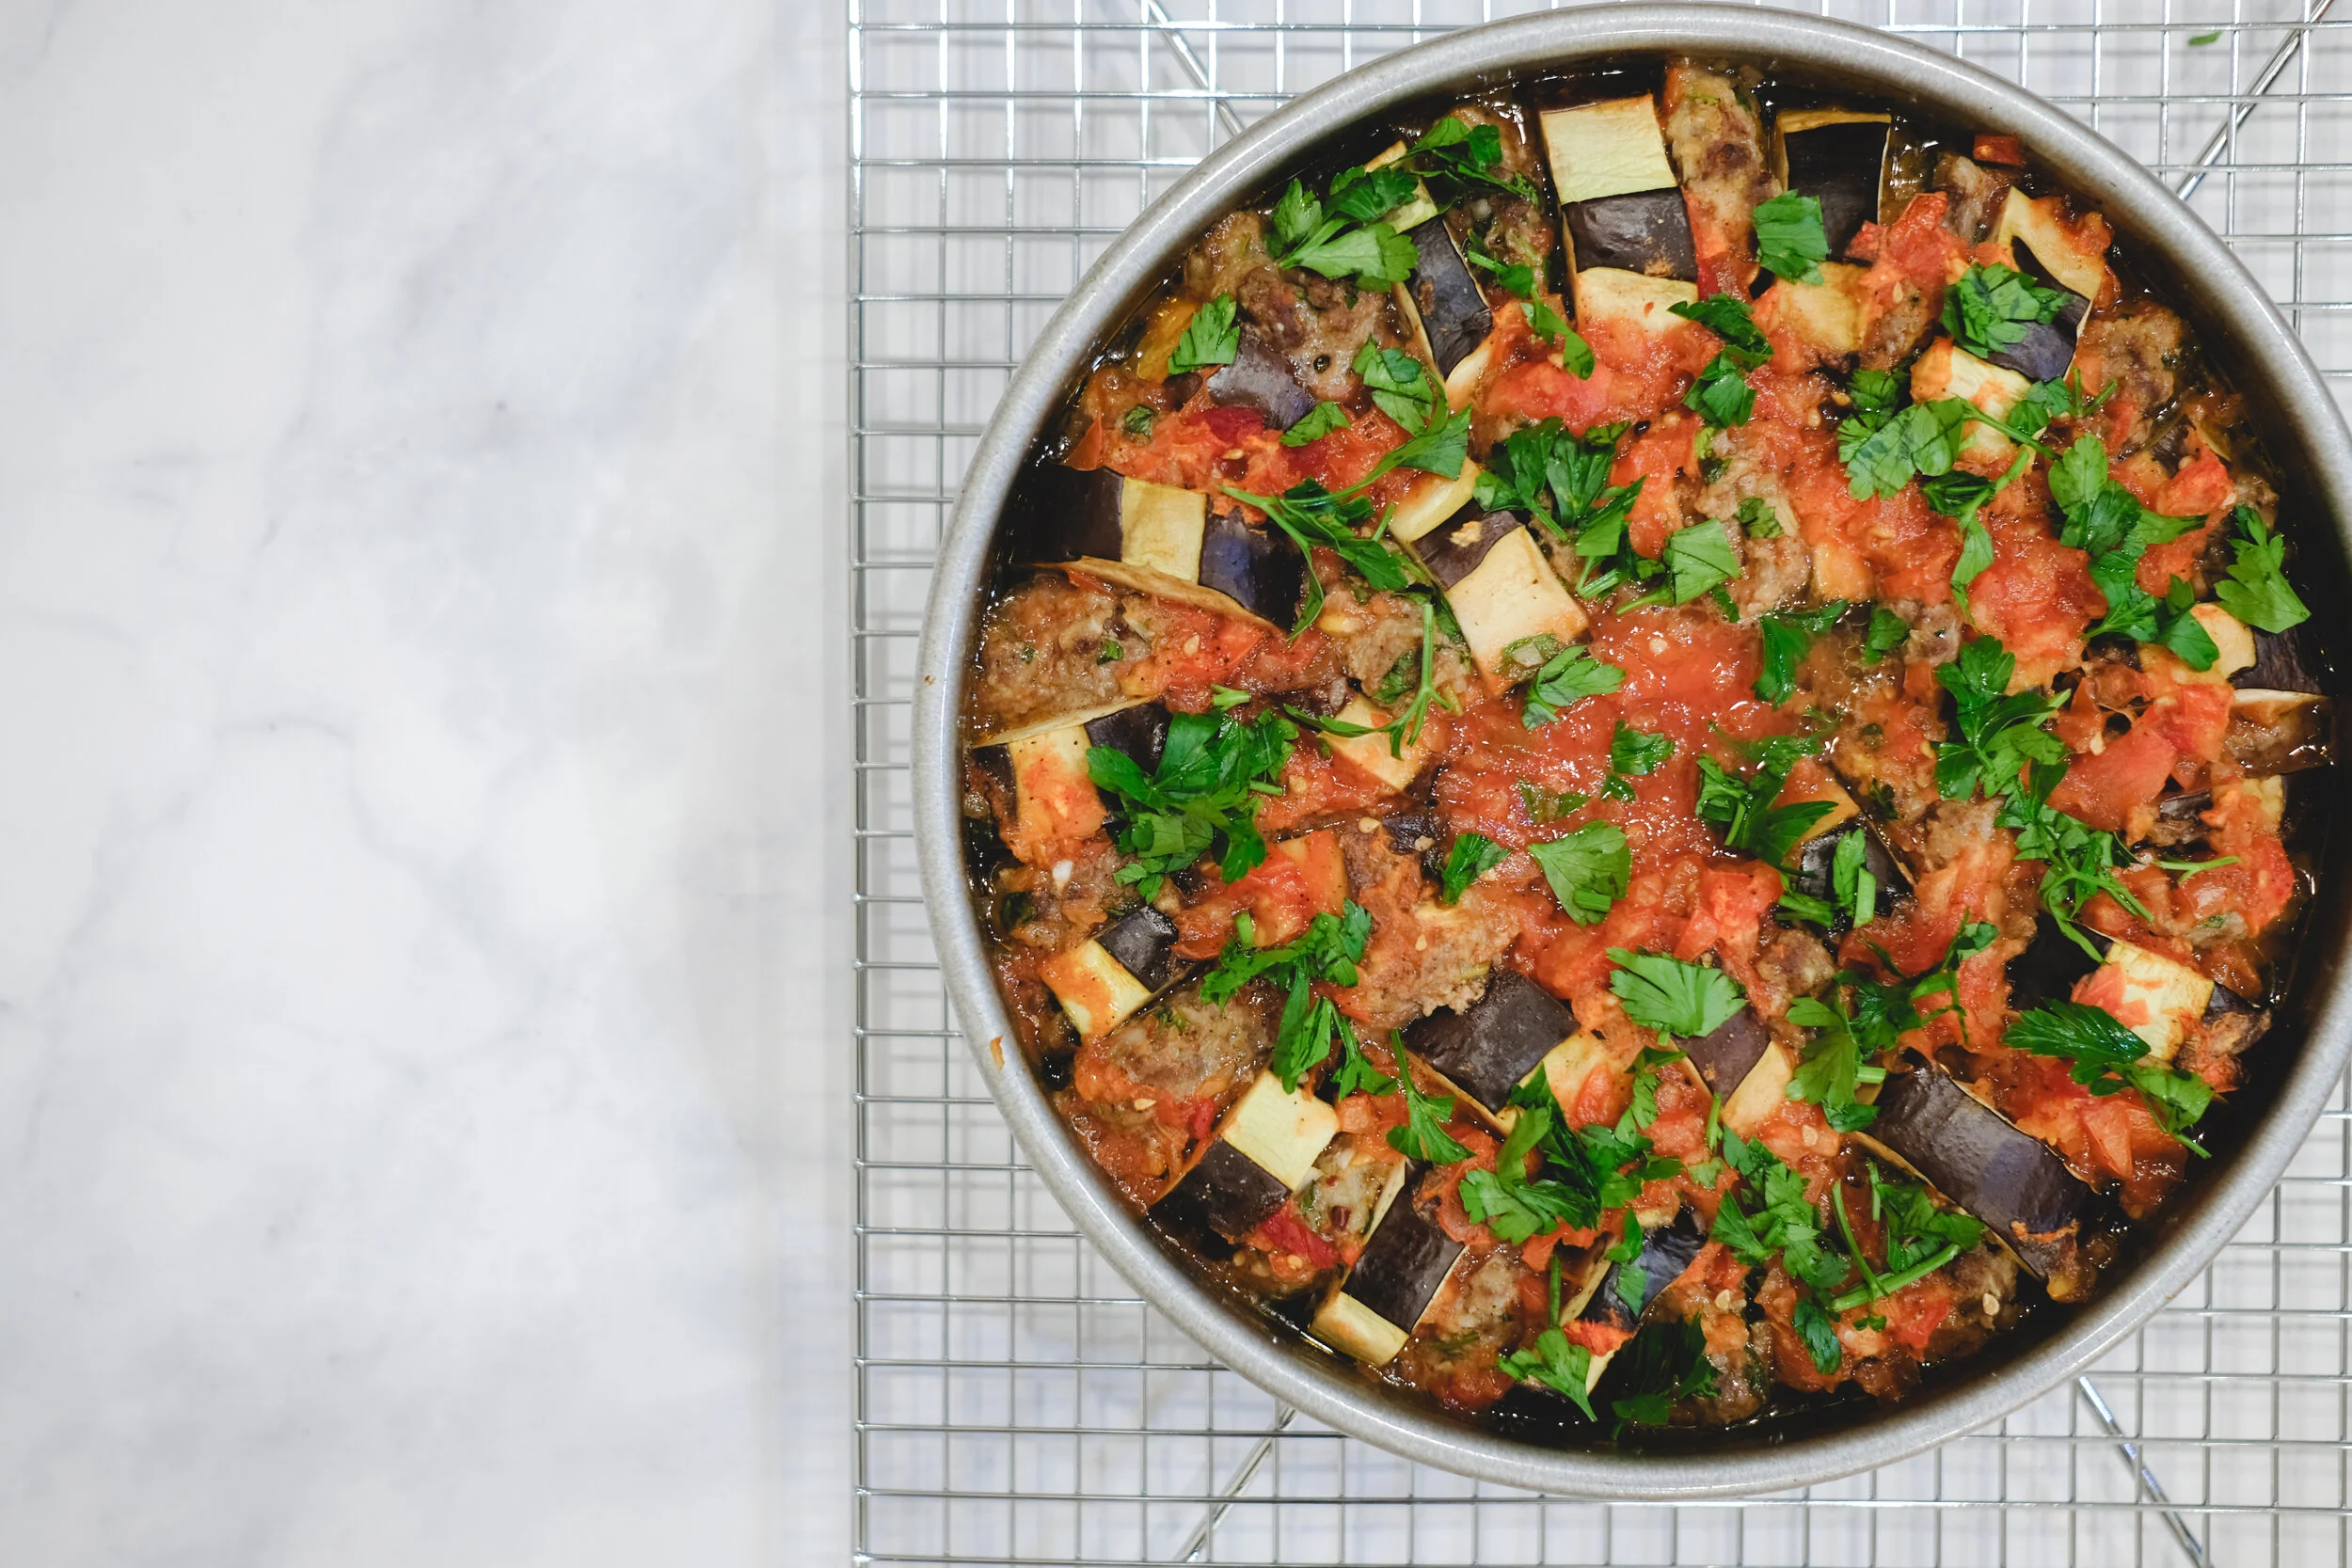
baked eggplant kebab mintandsumac

Baked Eggplant Kebab

November 19, 2019 by Gizem in Dinner, Beef

What makes you home sick? Yesterday I was watching the Netflix show Chef’s Table, specifically, the episode featuring Turkish chef Musa Dağdeviren. I don’t know whether it was the music that plays at all the right moments synchronized with amazing cinematography or all the familiar sights and sounds emanating from the TV screen, I found myself sobbing uncontrollably at every sight of food. And this is the third time I have seen that episode so I knew exactly what was coming. After watching Chef’s Table all I could think about was how much I missed eggplant kebab so I found myself in the kitchen making this for dinner.

Every summer I spent with my grandparents in Alanya I secretly wished my grandma would make some eggplant kebab. It was not her most popular dish compared to her manti or her dolmas but to me it was special. She generally made it right after we harvest some fresh eggplants from the garden. I modified her recipe a bit and converted it from the stovetop to the oven but at its core, it is still the same dish. I know eggplant season is technically over and everyone moved onto pumpkin, cranberries and turkey but if you get tired of all the Thanksgiving food, try this eggplant kebab for a change and I promise you will be coming back for more.

Tips:

I prefer using skinny and long eggplants for this dish. The really big and plump eggplants result in very large slices and they don’t fit into the baking pan.

Pair this dish with some buttery rice pilaf.

Yields: 6 servings Time: 1hr 30 minutes

Ingredients

3 medium sized eggplants

For the meatballs:

1 lbs lean ground beef

1/4 cup breadcrumbs

1/4 cup parsley, chopped

1 cup onion, grated

2 garlic cloves, minced

1 teaspoon cumin

1 teaspoon marash or aleppo pepper

1 teaspoon salt

1 teaspoon black pepper

For the sauce:

1 tablespoon tomato paste

1 tomato, chopped

1/2 teaspoon salt

1/2 teaspoon black pepper

1 cup water

Preparation

1. Preheat oven to 400F.

2. Wash the eggplants and peel them in alternating stripes. You can also leave them unpeeled, completely up to you.

3. Fill a bowl with cold water and add 1 tablespoon of salt. Mix to dissolve the salt. Slice the eggplants in 1/2 inch rounds and transfer them to the bowl with salt-water. Soak eggplants while preparing the meatballs. Salt-water reduced the bitterness of the eggplants and avoids browning.

4. In a separate bowl, combine ground beef, breadcrumbs, parsley, grated onion, minced garlic cloves, cumin, marash pepper, salt and black pepper. Mix the ingredients until everything is incorporated nicely.

5. Using your hands, make flat meatballs that have roughly the same diameter as the eggplant slices. You should aim to have 35-40 meatballs.

6. In a 9 inch round cake pan, arrange the slices of eggplants and meatballs in alternating order, one eggplant slice followed by one meatball. Once you complete the outermost ring, move inwards and repeat until the whole pan is full. If there is a small gap in the center, you can fill it with a tomato slice.

7. In a pan over low heat, mix tomato paste, chopped tomato, water, salt and pepper until tomato paste dissolves. Pour to sauce over the eggplants and meatballs.

8. Bake for 50-60 minutes until the eggplants are soft and meatballs are cooked-through.

Enjoy!

View fullsize meatball ingredients in a bowl
View fullsize eggplant slices and meatball mix
View fullsize in progress eggplant kebab arrangement
View fullsize eggplant kebab covered with sauce

You might also like these recipes
Baked Eggplant Kebab
Nov 19, 2019
Baked Eggplant Kebab
Nov 19, 2019
Nov 19, 2019
DSC08468-1.jpg
Nov 8, 2019
Romano Beans Braised in Olive Oil
Nov 8, 2019
Nov 8, 2019
mintandsumac-braised-eggplant-lamb.jpg
Nov 8, 2019
Braised Eggplant and Lamb with Yogurt
Nov 8, 2019
Nov 8, 2019
mintandsumac-turkish-flatbread-lahmacun.JPG
Nov 8, 2019
Turkish Flatbread (Lahmacun)
Nov 8, 2019
Nov 8, 2019
mintandsumac-baked-rainbow-trout-onion-salad-2.JPG
Nov 4, 2019
Baked Rainbow Trout and Onion Salad with Sumac
Nov 4, 2019
Nov 4, 2019
mintandsumac-zucchini-latke-mucver-1.JPG
Nov 4, 2019
Zucchini Latkes (Mücver)
Nov 4, 2019
Nov 4, 2019
November 19, 2019 /Gizem
eggplant, beef, meatballs, kebab
Dinner, Beef
Comment
  • Newer
  • Older

Powered by Squarespace